If you’re a blogger, you’ve probably come across lots of opinions about AI (artificial intelligence). Some people love it and see it as a revolution that will dramatically change the landscape of blogging and content creation. Others are using it to speed up their own blogging process, like Ryan does. And some are railing against AI, seeing it as vastly inferior to human writers.
Whatever your own views, it’s clear that AI is here to stay. As a freelance blogger, I’ll admit I have some mixed feelings! My whole career has merged my love of writing and my love of the online world, and while I definitely don’t want to see writers like me 👋 replaced by machines, I do love cool new tools and technologies.

Here’s my take: as AI stands right now, it’s a great companion tool for bloggers. AI can produce competent, very readable text … but it doesn’t yet come close to matching up to what a skilled freelancer, journalist, or author could write. So AI won’t be replacing bloggers any time soon … but it could help you significantly speed up and improve your blogging process, cutting out tedious tasks and letting you focus on the creative side of blogging.
In this article, we’ll be taking a look at how to use RightBlogger (using their free account) to write a fantastic blog post. (I’ll include links to other free tools as well, so you can still follow along with this guide even if you don’t have a free RightBlogger account.)
How to Write a Blog Post with AI (for Free): My RightBlogger Tutorial
Try RightBlogger: My 75+ Hand-Crafted Tools for Bloggers
Join 4,516+ creators, bloggers, marketers, writers, freelancers & entrepreneurs in using my very own kit of powerful tools for content creation: RightBlogger. You’ll unlock 75+ blogging, SEO, marketing, sales and productivity-focused tools to create content faster & more effectively today.
What is RightBlogger? (Set of 75+ AI Blogging Tools)
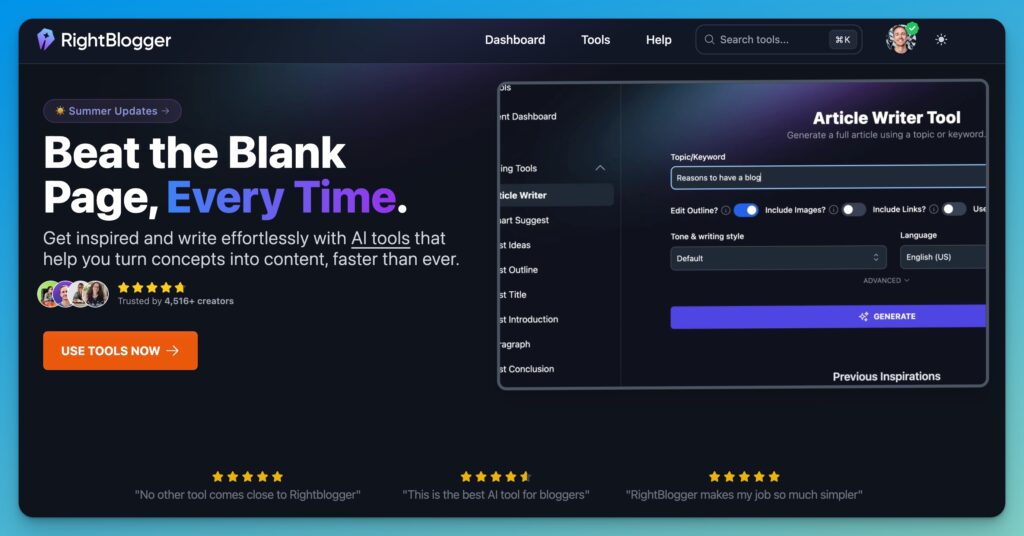
RightBlogger is a really powerful suite of AI tools developed by Ryan Robinson (the owner of RyRob, here). It offers a 100% free account to try all the tools out, and is aimed at bloggers & content creators of all levels—from complete beginners to experienced bloggers running multi-person companies. Here’s a quick preview of what one of their most popular tools, the Article Writer looks like:
There are lots of tools to guide you through how to write a blog post with AI (for free), including the idea generator, introduction writer, conclusion writer, outline generator, grammar fixer, and so many more. RightBlogger also has AI tools for social media and sales, and even tools to improve your productivity, making it a great all-in-one AI solution.
One of the things I really like about RightBlogger, compared with other AI text generator tools aimed at bloggers and content creators, is that they have a 100% free account that doesn’t require a credit card during signup—and if you like the tools, their pricing is very fair.
Currently, RightBlogger costs $29.99/month for unlimited access—and you can get that down to $24.99/month by paying annually. That’s only a little more than you’d pay for a premium ChatGPT subscription ($20/month), and you get Chat & so much more inside RightBlogger.
RightBlogger doesn’t have a word limit or “credits” limit in place on their Unlimited Plan. This is a huge bonus for bloggers. Even if you think you’ll only be creating a few articles each month, with most premium AI tools, you can run through credits really fast if you want to try a bunch of ideas or styles. With RightBlogger, you can use the tools as much as you like, experimenting with different ideas, different tones of voice, and even different languages.
Why Use RightBlogger Instead of ChatGPT?
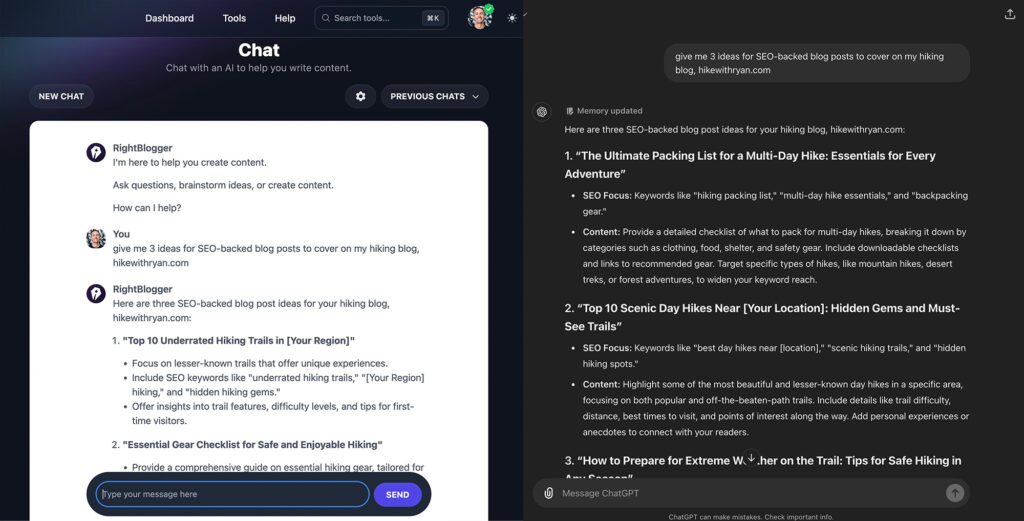
ChatGPT has become super popular with bloggers and content creators, partly because it’s free to use and very quick to get started with. RightBlogger also has AI-powered Chat as both a standalone tool & built into almost all tools, so you can ditch your ChatGPT subscription and still interact with your creations in an unlimited number of ways:
I think ChatGPT can be a lot of fun (I’ve used it for silly poems for my kids, among other things!) but it’s not necessarily the best AI tool for serious bloggers and content writers. The main limitation of ChatGPT is that it doesn’t have any built-in templates, so you need to keep trying and tweaking prompts to get the results you’re looking for. Sometimes it’s hard to even figure out what you might use it for.
RightBlogger makes everything easy with pre-created AI-powered tools that you can use to quickly and easily generate the text you need. Often, you just need to pop in a keyword, add your take on the subject, and optionally select a tone/style from a dropdown in order to get a really solid first draft.
It’s super quick and easy to create high-quality content … no more fiddling with prompts and getting an unexpected result.
As well as all the tools you need for blog writing, RightBlogger lets you create AI-generated content for social media posts (covering LinkedIn, YouTube, Twitter/X, Facebook, Instagram, TikTok, and more). There are also tools for sales copywriting, product descriptions, and landing pages, if you’re creating marketing copy. If you’re focusing on SEO content to get more traffic, you’ll love the SEO-optimized text options like meta titles and meta descriptions.
How to Get Started With RightBlogger (and Incorporate it Into Your Content Workflow)
Want to give RightBlogger a try? You can start with a 100% free account (no credit card necessary)—and if you decide to upgrade to their Unlimited Plan, don’t worry, if RightBlogger isn’t for you, there’s a full 30-day refund period.
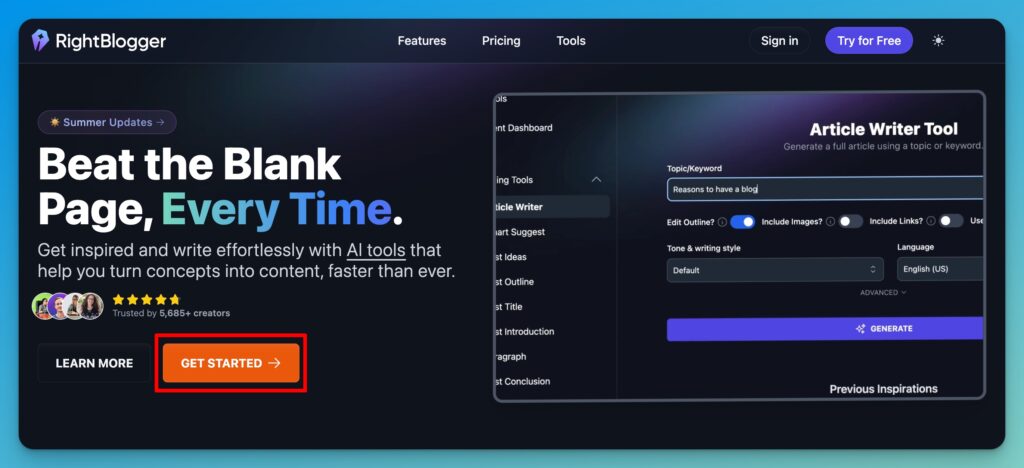
Head on over to RightBlogger and click the orange “Get Started” button:
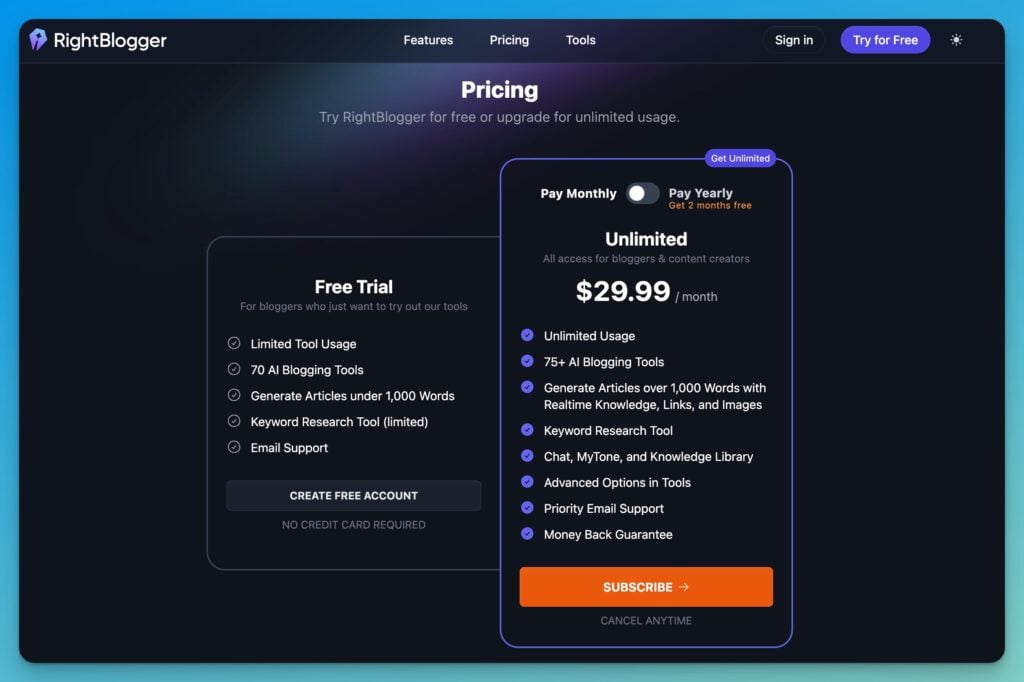
Next, you’ll have the option to create a free account (with a monthly word count creation limit) or choose Unlimited with either a pay monthly or yearly option. Yearly will get you the best overall deal.
You can cancel at any time, and Ryan’s super generous with refunds to anyone who asks, so I recommend jumping straight into Unlimited so you’re not constrained—and if it’s not what you’re expecting, you can cancel & get a refund straight away.
Then, you just need to enter your payment details and subscribe:
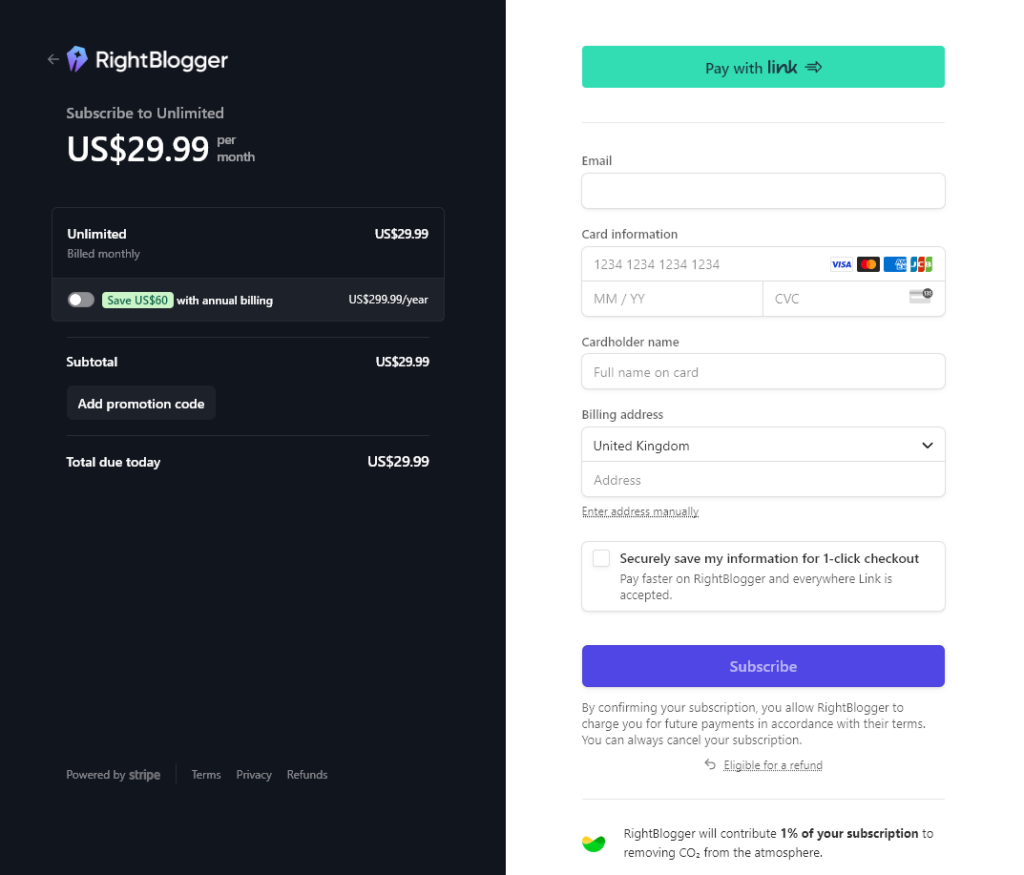
Tip: Can’t afford the $29.99 for a month of RightBlogger? Start with a free RightBlogger account to try things out. I recommend using the full, unrestricted versions of the tools inside RightBlogger for the very best results—but if you’re a brand new blogger just getting started, try their free account, or take Ryan’s free blogging tools for a spin first.
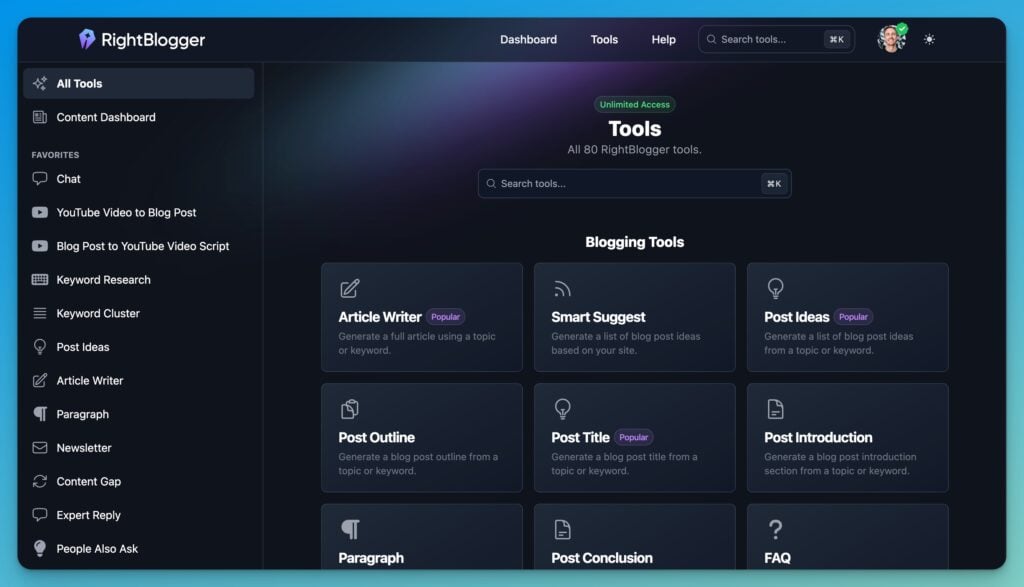
Once you’ve created your RightBlogger account, you can log in. Here’s how the RightBlogger dashboard looks:
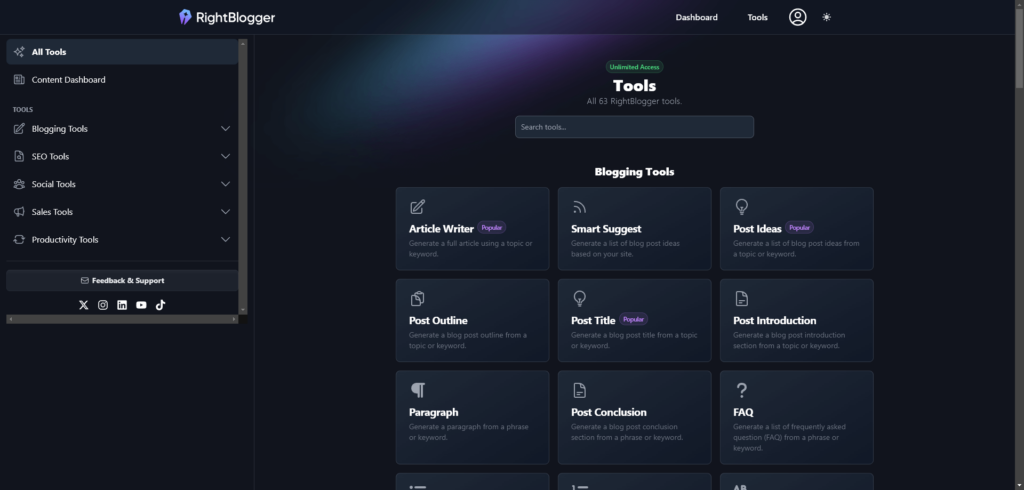
There are loads of tools to choose from. Feel free to have a play around with them—you’ve got unlimited usage, and you won’t break anything!) But if you want a more structured approach, just follow the steps below to create a blog post.
How to Write a Blog Post with AI (for Free): My RightBlogger Tutorial
Alright, so you’re ready to create your first blog post using RightBlogger—but you don’t know what to write about. No problem! RightBlogger has some fantastic tools to help you. We’ll run through the whole content creation process, step by step.
Step 1: Choose a Keyword Using the RightBlogger Keyword Tool
The first tool I’d recommend you use is the Keyword Research tool. You’ll find this under SEO Tools in the left-hand navigation menu:
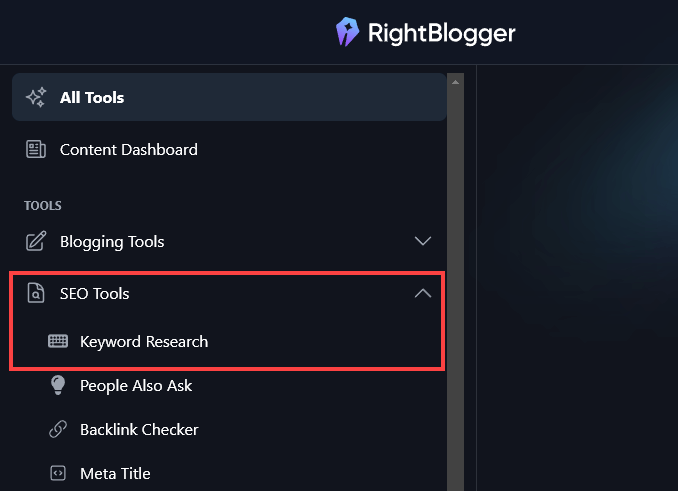
Free Alternative: Ryan’s made a version of this keyword research tool available completely free.
Keyword research is the foundation of good SEO (search engine optimization). If you’ve found the idea of keyword research a bit daunting in the past, don’t worry—RightBlogger can handle it all for you.
All you need to do is put in a starting keyword or seed keyword that relates to your blog topic. Let’s say you’re writing a travel blog. You might want to write about “travel in Europe”. Type in that keyword and hit the Submit button.
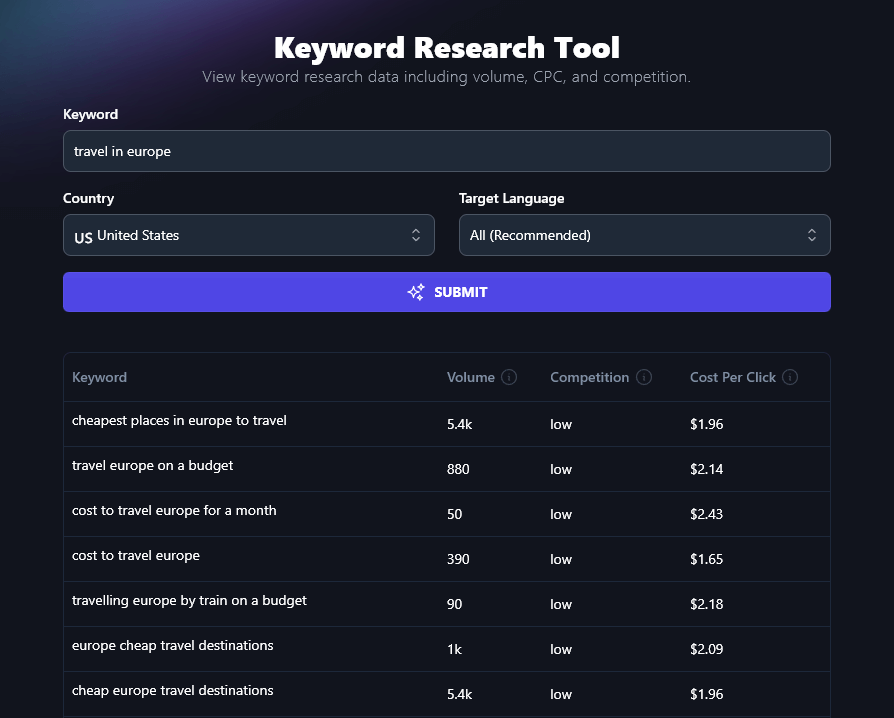
You’ll see a whole list of keywords, with volume, competition, and cost per click. You can sort this list by clicking on the headers.
Tip: Look for keywords with 1,000-10,000 volume and low or medium competition. These should be achievable and bring in enough traffic to be worth targeting.
You could save a list of keywords to target or you can pick one for the post you’re working on. Depending on your keyword, you might be able to easily come up with a blog post title. For instance, if your keyword is “cheapest places in Europe to travel” you might title your post: 12 Cheapest Places in Europe to Travel (and What Makes Them Special).
Step 2: Come Up With Ideas for Your Blog Post With RightBlogger
Another way to come up with your blog post idea is to use the Blogging Tools→Post Idea tool. (If you don’t have a RightBlogger account, you can use the free blog post idea generator instead.)
Let’s say you have a blog about healthy eating and you want to write something on that topic, you’re just not sure what. Go ahead and put “healthy eating” in as the Topic/Keyword, then hit Generate.
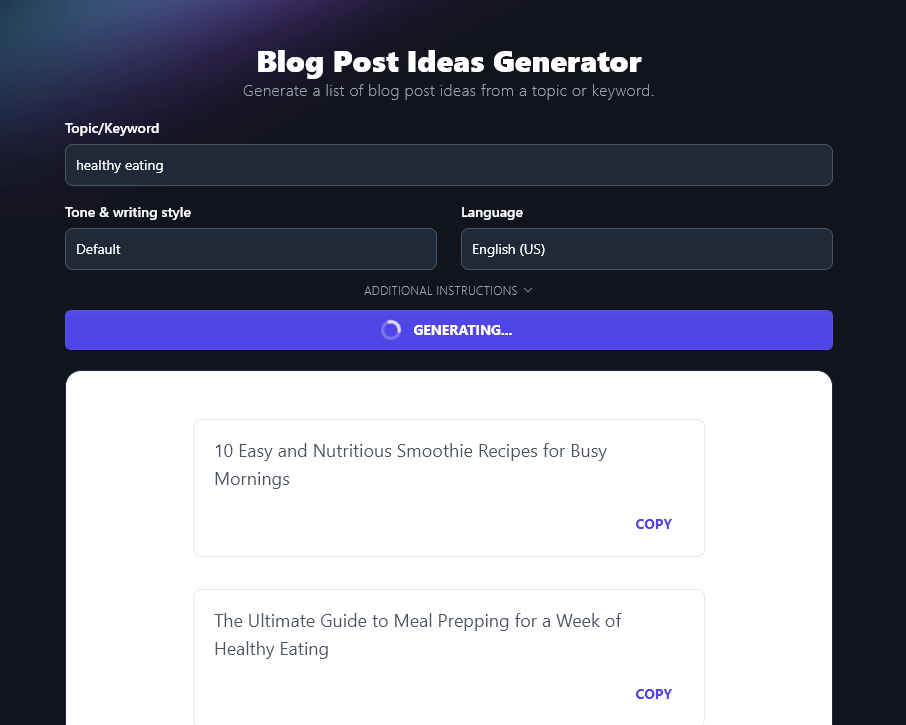
You’ll get 10 blog ideas—if you want more, just go ahead and run the tool again for the same keyword. You can brainstorm tens or hundreds of ideas in dramatically less time than it would take to come up with them on your own.
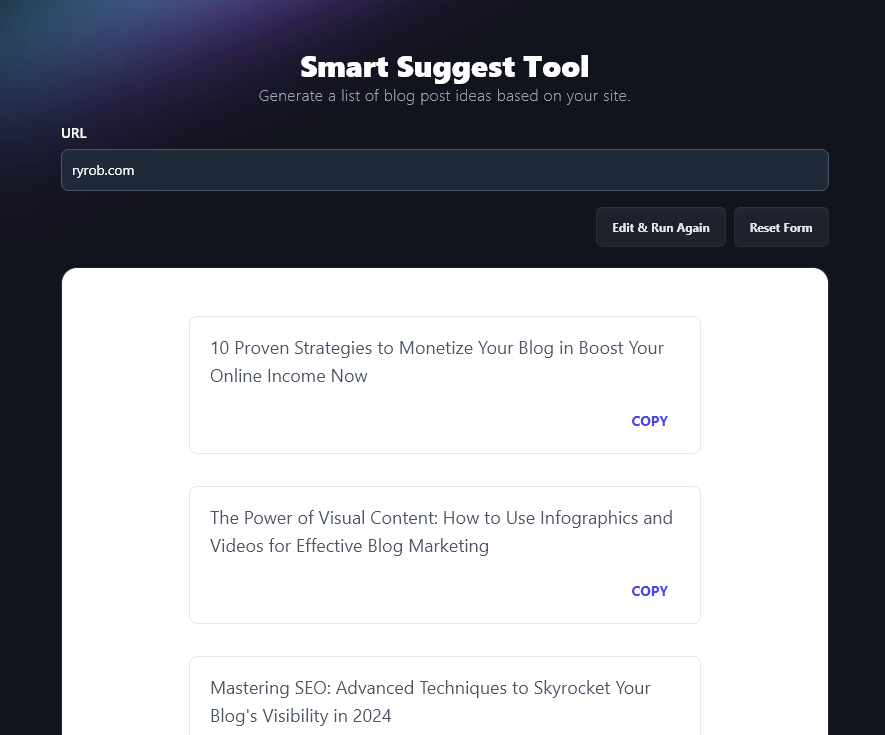
Another amazing tool to use, if you’ve already got an established blog, is the Smart Suggest too. This works like magic (seriously, I was blown away the first time I used it to come up with topic ideas for my own blog).
You simply pop your blog’s URL into the tool and it’ll instantly analyze your existing posts and come up with 10 titles on similar topics. Here are a few it created for RyRob.com:
Step 3: Outline Your Blog Post With RightBlogger
As a freelancer, I deal with a lot of blog post outlines. With some of my clients, I develop their ideas into full outlines and get those approved before drafting the full piece. With other clients, they send me outlines to work from. And for my own blog, I outline posts ahead of time to help me stay on track with my content calendar.
There are a couple of ways you can use the Post Outline tool in RightBlogger:
- Use the tool to create your outline first, then edit the outline (removing/changing ideas that you’re not so keen on, and adding any extra ideas)
- Write your outline first yourself, then use the tool to check whether you’ve missed anything you’d want to include
Personally, I usually go for option 2, at least with my own blog where I want posts to really carry my own voice and ideas. But neither way is right or wrong.
Tip: If you don’t have a RightBlogger account, you can use the free blog outline generator.
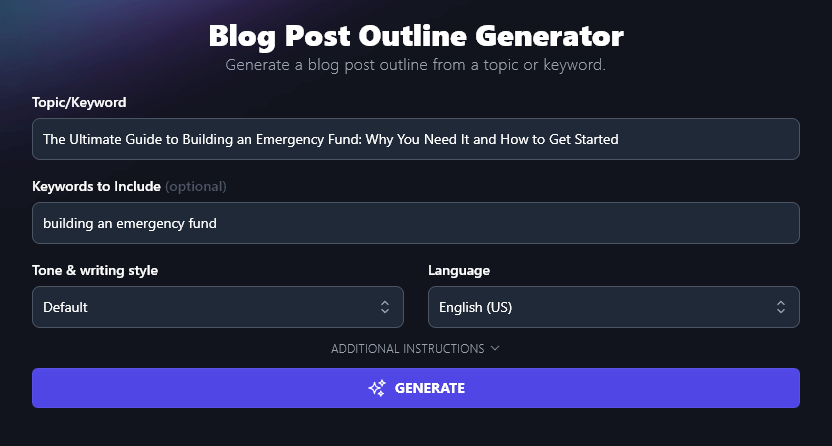
Let’s say you’re writing a personal finances blog and you’ve chosen an idea from the idea generator: The Ultimate Guide to Building an Emergency Fund: Why You Need It and How to Get Started.
You know this post will be a great fit for your audience … but you’re not sure where to begin putting that guide together. Simply copy that title into the Post Outline tool and RightBlogger will handle everything for you. If you want, you can even include a keyword (“building an emergency fund”) for the tool to incorporate:
When you’re ready, just go ahead and hit the “Generate” button. Here’s the outline:
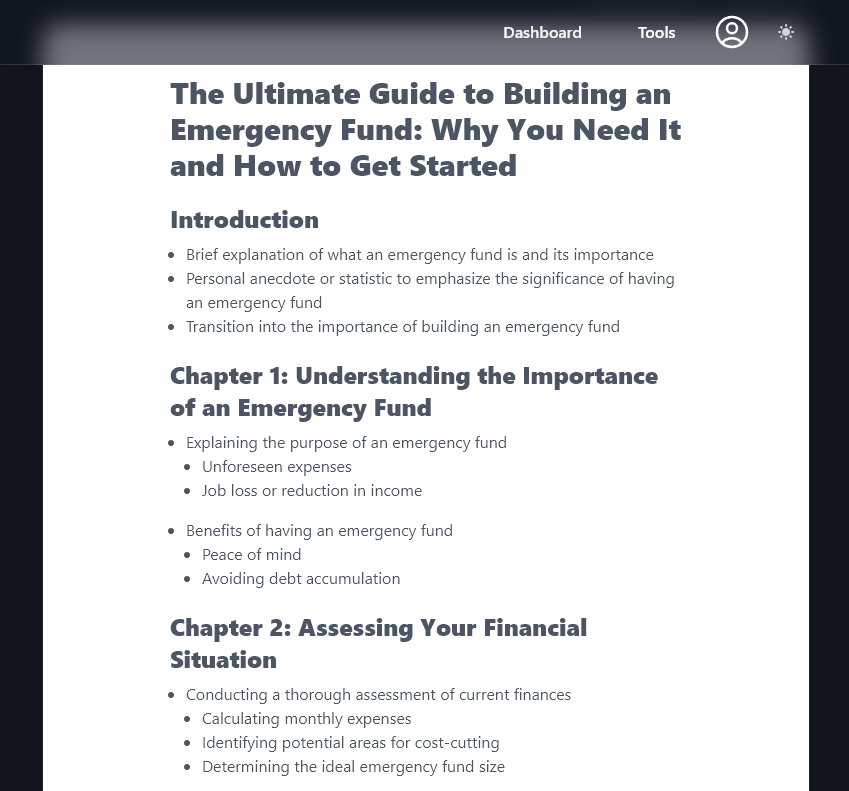
You can copy this outline into Google Docs, Notion, Evernote, or any tool of your choice, then edit it to suit you. For instance, you might want to add to the “benefits of having an emergency fund” and also include a point on “being able to take risks”.
If you’re writing an outline yourself, I’d recommend making sure you include a few talking points for your introduction and conclusion, and giving yourself a clear structure with subheadings to cover major points in the main body of your post—just like RightBlogger does. For more help, check out this guide to creating an engaging blog post structure.
Step 4: Draft Your Post (With or Without RightBlogger!)
When it comes to drafting, I personally prefer to write content myself, without using AI tools except in limited circumstances (e.g. if I want to rephrase a paragraph from a post I’ve already written). This works best for me as I’m a fast writer and I find myself spending too much time editing AI-drafted content.
But if you’re a slower or less confident writer, then it’s fine to use AI for your first draft. You may find it helps a lot to have something down on the page, even if you end up editing it to add in lots of your own ideas or your personal style.
The AI writer doesn’t draw directly from any single source, so the content you draft using AI algorithms will automatically avoid plagiarism.
If you’re using RightBlogger as an AI blog writer, these are some of the best tools to try:
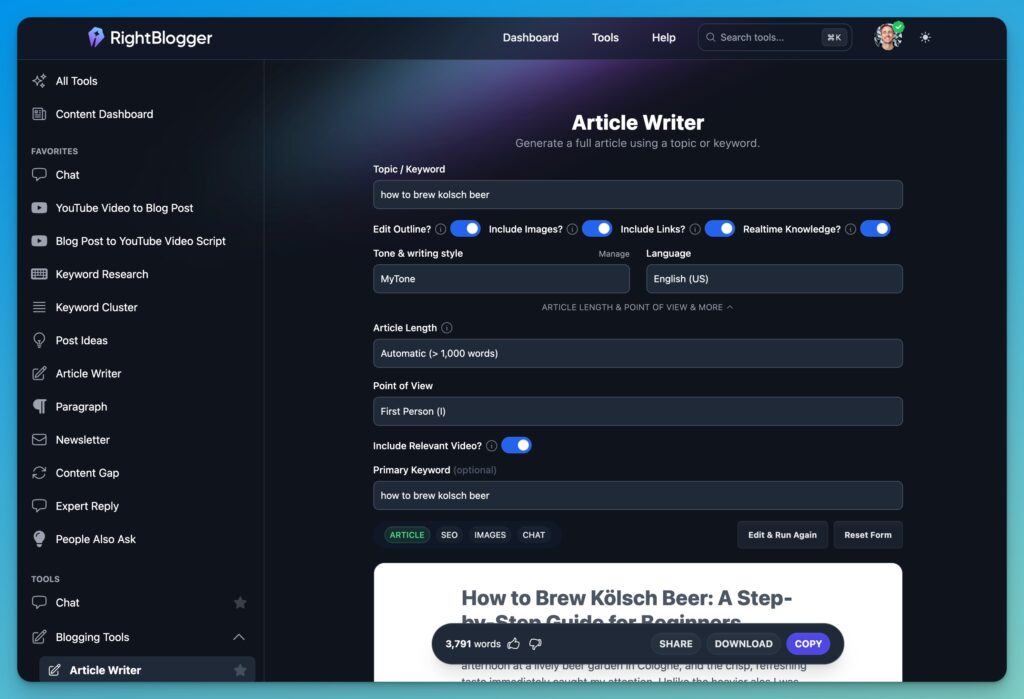
The Article Writer

This tool is incredible for content generation! It can put together a full long-form blog post for you, complete with images, links, and even real-time data if you want. You can choose to edit your outline before the tool creates your article, too. (There’s a free version of the article writer, too, but it’ll only produce short blog posts.)
If you’re in a hurry or you’re creating content that doesn’t need to be of a particularly high standard, such as sponsored content for link building, this tool can do 90%+ of the work for you, taking you from a blank page to full generated text in just minutes.
Tips for Using the Article Writer Effectively:
You’ll get the most out of this AI writing tool if you:
- Adjust the “Tone & Writing Style” to suit you. The default tone and style will work fine in many cases, but you can get more of a sense of voice and personality by picking something like Creative, Casual, Excited, or Fun & Quirky. Try as many options as you like until you find one that matches your brand voice.
- Use the Advanced options. Here, you can choose between short-form and long-form content, add extra instructions for the outline, and you can even choose what point of view to use for your article (I, we, you, or they). You can also add additional instructions (in natural language) and tell the article writer more about your target audience.
- Change the language if you’re writing for a non-English audience. There are over 100 different languages to choose from in RightBlogger, saving you from needing to manually translate content.
The Post Introduction Tool

Nailing your introduction can be so tough. I often advise bloggers to simply skip the introduction, start with their first main point, and write the intro once they’ve finished the rest of the post. But I know some people find it really hard to move on without something down on the page.
The introduction tool lets you quickly create the introduction to your post (based on your topic, title, or keyword). You’ll get 4 options to choose from, and you can run the tool again if you want more options.
If you’ve not got RightBlogger, you can use the free introduction generator instead.
Tip: Chosen a keyword to optimize your post around? Add it in “Keywords to Include” as it’s important to use your keyword early on in your blog post.
The Paragraph Tool
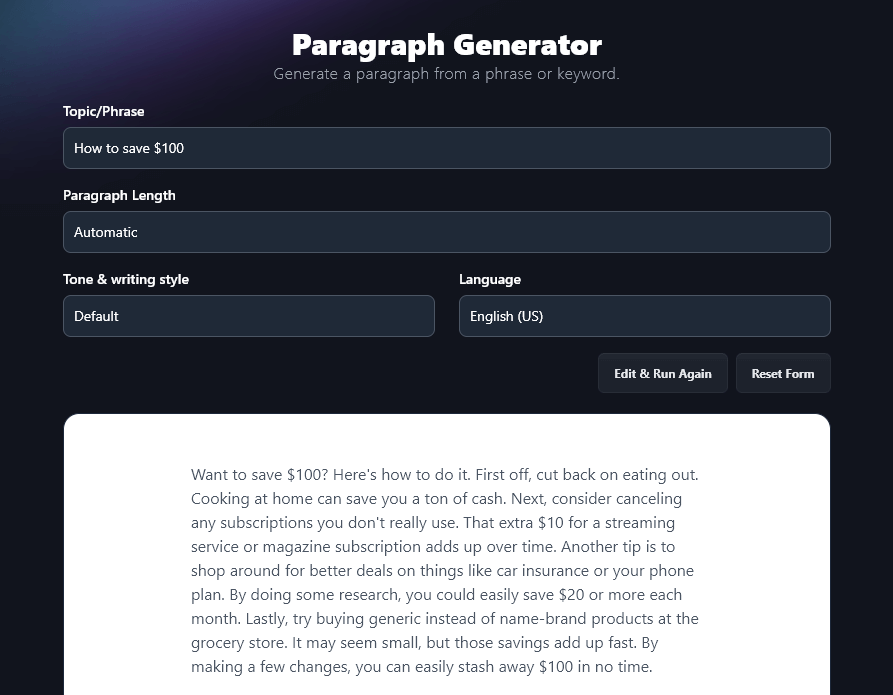
The paragraph tool does what you might expect: it writes individual blog post paragraphs. This is really handy if you want to draft most of your post yourself, but you’re struggling with writer’s block on a couple of paragraphs. Just choose a bullet point or short phrase from your outline and give it a whirl.
Not got a RightBlogger account? You can use the free paragraph writer here.
The Rewriter Tool
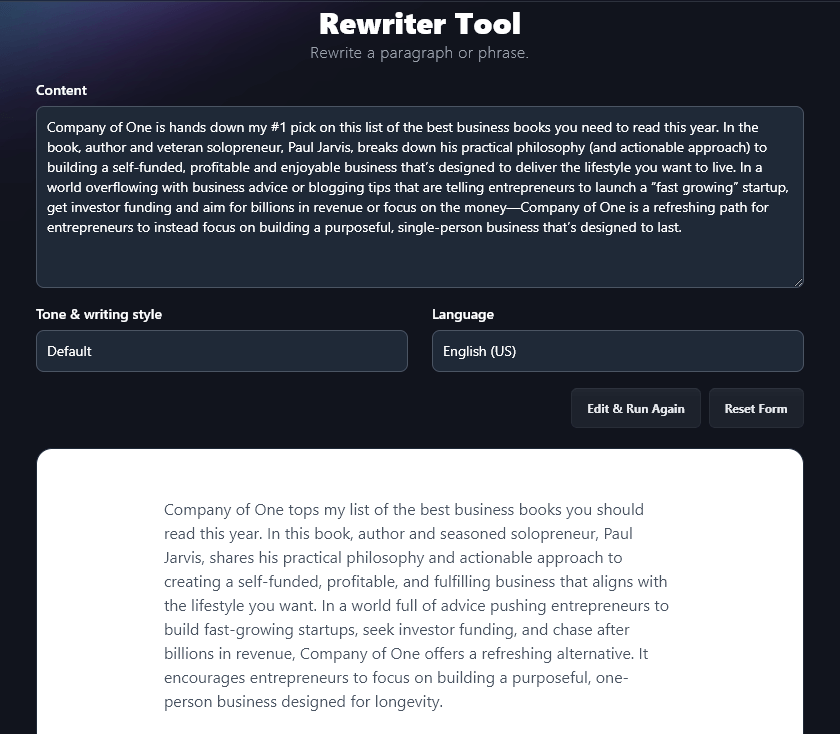
If you do a lot of blogging, you’ll sometimes find yourself needing to cover the same ground. Maybe you wrote a list of your favorite business books, for instance, and now you’re writing a list of the books you’ve read in 2024—at least a couple of those books might be the same ones.
It’s best to avoid copying the exact same information from one post to another (this can cause “duplicate content” issues with Google). Instead, you can use the Rewriter tool as an AI writing assistant to rework your content—keeping all the same information but wording it differently.
If you don’t have access to RightBlogger, try the free paragraph rewriter for paraphrasing instead.
The Post Conclusion Tool
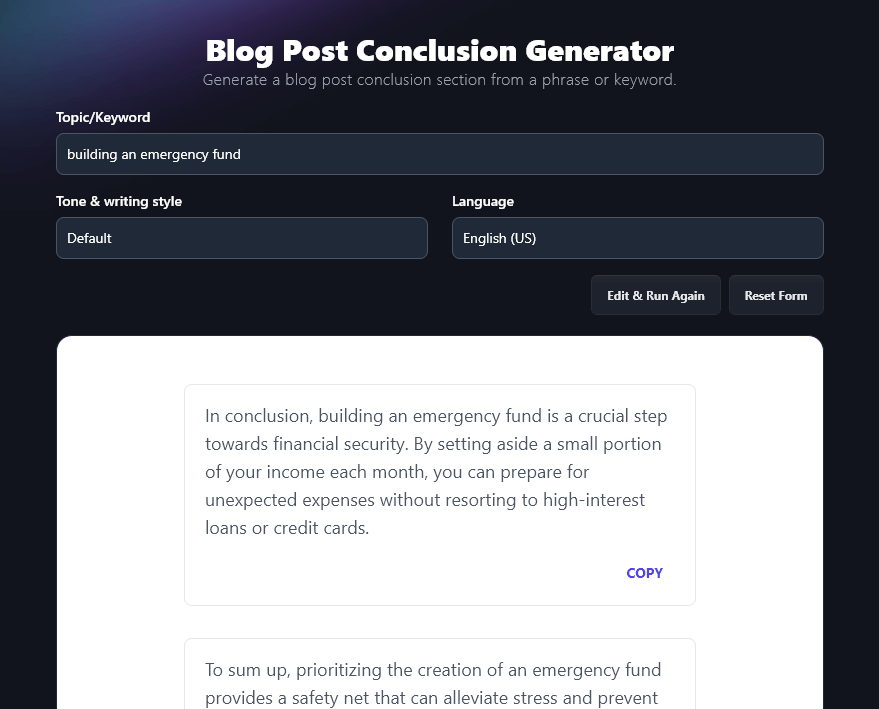
Like introductions, conclusions can be tricky to write. In fact, one of the biggest mistakes I see bloggers making is that they simply leave off the conclusion altogether. They might stop with the final point of a list, in a listicle, or simply end the post without a sense of closure.
The post conclusion tool in RightBlogger lets you create a clear ending paragraph for your post. You could use this verbatim or you can edit it or use it as inspiration for your own conclusion. Just like with the introduction tool, you’ll get 4 different options to choose from.
There’s a free conclusion tool as well, if you don’t yet have a RightBlogger account.
The FAQs Tool
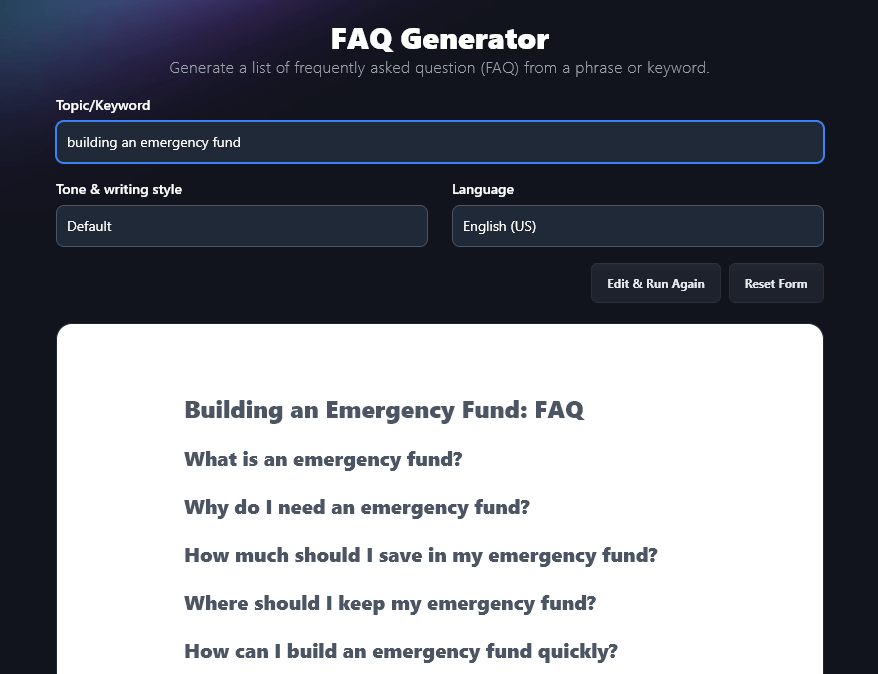
Need to round out your post with some FAQs? This can be a great way to make your post even more useful for readers—and it can give your blog’s SEO a boost, too.
The FAQ tool can come up with a whole set of FAQs for any topic. You can opt for just the questions or you can include answers too, and just like with the article writer, the FAQ generator’s functionality includes the option to use realtime data.
Step 5: Check Your Facts and Your Grammar
Once you’ve got a complete blog post, it can be really tempting to just go ahead and hit Publish. But it’s important to spend at least a little bit of time on the final stage of the writing process: editing your post before finalizing it.
Whenever you’re using any AI tool, you need to check any facts, citations, and references in your post. AI tools are getting better all the time, but they still sometimes assertively state facts or create statistics that simply aren’t real. Make sure you find a reputable source for any specific information (like numbers, percentages, or quotes) within your post. Ideally, look for a government website, large newspaper website, or a well-known blog that states those facts.
It’s also important to check your grammar and spelling before publishing. AI content will normally be flawless in this regard! The grammar fixer in RightBlogger is really handy if you’ve drafted your own content, especially if you know you sometimes struggle with grammar, spelling, or punctuation. There’s even a free version of the grammar fixer that you can try out to help polish your text.
Tip: If possible, give yourself a bit of time between finishing your post and editing it. You’ll find that mistakes in your original content jump out more when your eyes are fresh.
Give RightBlogger a Try—and Learn How to Write a Blog Post with AI (for Free) Today
I know AI isn’t for everyone … but I do think that every blogger should at least give it a try. There are so many different use cases that you’re sure to find a way to use AI-driven content to help streamline your blogging process.
Even if you just use generative AI to help you come up with ideas or to refine your outlines, it could be well worth your time and money, as its powerful automation tools will help you produce better posts, faster.
You can sign up for a free RightBlogger account and get started with the premium versions of all Ryan’s tools today (and we’ve only scratched the surface in this post … there are 75+ different tools in there to choose from). RightBlogger is getting more advanced all the time, too, with the power of machine learning.
If you can’t afford RightBlogger at this stage on your blogging journey, go ahead and use Ryan’s free AI tools instead. There are over 30 of them and you don’t have to sign up or jump through any hoops to use them—they really are completely free.
Above all, when you’re using AI, treat it as a handy assistant and companion on your blogging journey. You don’t need to hand over any control—but you can definitely hand over some of the more tedious bits of content writing and content marketing.
I’d love to hear how you get on with RightBlogger and/or the free tools, so do pop back and leave a comment below to tell us the title of the blog post you’re working on and which tools you’re using.
Try RightBlogger: My 75+ Hand-Crafted Tools for Bloggers
Join 4,516+ creators, bloggers, marketers, writers, freelancers & entrepreneurs in using my very own kit of powerful tools for content creation: RightBlogger. You’ll unlock 75+ blogging, SEO, marketing, sales and productivity-focused tools to create content faster & more effectively today.
Disclaimer: This story is auto-aggregated by a computer program and has not been created or edited by budgetbuddy.
Publisher: Source link
Publisher: Source link