One of my biggest content creation secrets, is that I almost always follow one of ten proven blog post templates I’ve developed over the years. This approach not only helps me brainstorm great content ideas, but also helps me write faster, save time during the editing process and it sets my posts up for quicker promotion success.
Do you ever struggle to write enough content for your blog? Maybe you have plenty of content ideas, but when you sit down to write, you find yourself scrapping your posts after a few paragraphs. You might blame yourself for not being focused enough—but in all honesty, that’s likely not the real problem.
It’s really hard to craft a well-structured blog post unless you have a structure in mind before you start writing. Using a blog post template lets you easily “see” how your post should be structured from the beginning—making it much easier to then dive into the process of writing that blog post. Be sure to check out my free AI article writer to get a jump start on this process.
In this guide, I’m going to share ten of my favorite blog post templates—so that you can deploy them in your writing process, whether you’re just starting a blog or deep into your business. I’ll explain what to include in each type of post, why you might want to use a particular post format in any given situation, and I’ll show you some real-life blog examples too.
10 Blog Post Templates (+ Free SEO-Driven Template) to Download Today
- How-to Post Template
- Beginner’s Guide Template
- List or “Listicle” Post Template
- Expert Roundup Post Template
- Glossary Post Template
- Case Study Post Template
- A vs B Post Template
- Myth Buster Post Template
- Product Review Post Template
- Infographic Post Template
Disclosure: Please note that some of the links below are affiliate links and at no additional cost to you, I’ll earn a commission. Know that I only recommend products and services I’ve personally used and stand behind. When you use one of my affiliate links, the company compensates me, which helps me run this blog and keep my in-depth content free of charge for readers (like you).
👋 Grab my free blog post template (in copy & paste Google Doc format), including my SEO writing checklist and a fully completed example to guide you along the way. This template works with any of the templates we’re covering in this guide, and will help make sure you’ve optimized your content for search engines by paying attention to keywords, links, competing articles and much more.
Want my Free SEO-Driven Blog Post Template?
Grab my free template to create your own traffic-driving content today.
“*” indicates required fields
Want to watch along as I talk through how to implement these templates into your own blog writing process? Here’s my tutorial video:
Now, let’s dive in and talk about the first (and arguably most popular) of our blog post templates here.
1. How-to Post Template


This is my own personal favorite blog post format (the how-to), which naturally suits the kind of long-form, in-depth evergreen content that characterizes my blog.
What is a How-to Post?
A how-to post is a piece of content that teaches the reader how to do something. This could be something small and specific (like “how to set up Google Alerts”) or something much larger (“how to start a business”). It’s sometimes also called a step by step guide.
Key Benefits of the How-to Post Format
How-to posts are:
- Hugely popular with readers. Look at any popular blog and you’ll see that plenty of their top posts are how-to posts. These match well with users’ search intent, as people will often search for how to do something.
- Great for helping readers take action, which means they’ll see real results from reading your blog.
- Easy to write and structure as the steps need to be ordered chronologically (in the order in which the reader would do them).
What to Include in Your How-to Post
A how-to blog post template includes:
- A short introduction, previewing what you’re going to teach the reader.
- Numbered steps, with enough explanation of each for the reader to follow the instructions.
- A conclusion, which could encourage the reader to take the first step.
Here’s how you could write and structure each of those main components:
Introduction:
Ideally, keep this relatively short: the reader wants to learn how to do whatever you’re teaching them.
Optionally, you could add a “Why” section after the introduction and before the numbered steps, if you think that the reader may need to be convinced of the benefits. Alternatively, you might have a brief “What” section to explain a key idea or concept that readers need to understand.
Numbered Steps:
The main body of your how-to post should be made up of numbered steps. It’s a good idea to think these through ahead of time, before you start writing. Sometimes, the steps will be fairly obvious; other times, you may need to carefully think through the process.
If you’re struggling to come up with the right steps, it can help to work backwards. Consider the end goal and what the reader would need to do immediately before that. Then, keep thinking of each previous step until you get back to a logical starting point.
Conclusion:
Sum up what the reader should have accomplished after following the steps. If appropriate, you might want to include a screenshot or photo of what they’ll see. If you’ve written quite a long or involved how-to (e.g. “how to become a freelance writer”), you could finish by encouraging the reader to just take the first step.
How-to Blog Post Examples
How to Start a Freelancing Business While Working a Full-Time Job: In this post, I go through 10 steps readers need to take in order to successfully start a freelancing business in addition to their day job.
The steps are listed immediately after the introduction, with jump links so the reader can easily jump to each step. This is particularly helpful for how-to posts that might take the reader days or weeks to complete.
I also included a “why” section to address why I started (and why the reader might want to start) a freelance business while still working my day job.
How to Validate a Business Idea in 30 Days with Less Than $500 (My Validation Challenge): I structured this post in a similar way to the previous one, with a list of numbered steps at the top. There’s a “What is Idea Validation?” section before the numbered steps of the list, to get readers up to speed on the concept and why it’s so important.
You can grab my free blog post template right here (in a copy & paste Google Doc format), including my SEO writing checklist and a fully completed example to guide you along the way.
Want my SEO-Driven Blog Post Template?
Grab my free template to create your own traffic-driving content today.
“*” indicates required fields
2. Beginner’s Guide Template

What is a Beginner’s Guide Post?
A beginner’s guide is a piece of content that’s aimed at getting brand-new beginners started with something they haven’t done before. It can be structured in a very similar way to a how-to post as a beginner’s tutorial, like How to Make a Website in 3 Easy Steps: Free Tutorial for Beginners. However, a beginner’s guide should have some unique features incorporated into it—namely a focus on more concise, distinct sections that can link out to more comprehensive resources across your blog (for further reading or deeper instruction).
Key Benefits of the Beginner’s Guide Post Format
Beginner’s guides are:
- Great for attracting new readers. Most people in any given niche are beginners, after all. If you capture someone’s interest just as they’re getting started in your niche, they’re likely to stick around as a fan for months or years to come.
- Effective ways to draw readers further into your blog. Because a beginner’s guide won’t go too deep, you can easily link to more detailed posts for additional reading.
- Helpful resources for attracting links. If you write a more advanced post, you can link back to your beginner’s guide to help new readers get up to speed.
What to Include in Your Beginner’s Guide Post
A beginner’s guide blog post template includes:
- A short introduction, reassuring readers you’ll explain exactly what they need to know.
- Short, clear sections. These might be numbered steps, but they don’t have to be.
- A conclusion, prompting the reader to take action and get started.
Here’s how you could write and structure each of those components:
Introduction:
You’re addressing complete beginners, so be kind and reassuring in your introduction. You could briefly address common fears, worries, or questions they may have.
In these types of blog post templates, you may want to include a “What is” section immediately after the introduction. This lets you explain the key concept in beginner-friendly terms. For example, if you’ve written a beginner’s guide to social media, your first subheading might be “What is social media?”
Short, clear sections:
Your beginner’s guide should be broken into short sections. Each of these should have a subheading. The subheadings are like signposts for your reader: they help the reader know where they are in your post, and give them a quick sense of what you’ve already covered and what’s still to come.
Depending on your topic, you might have sections that build on one another in a step by step way – like a how-to post. Many beginner’s guides will instead have sections that answer common questions or address key issues of “what” and “why”.
For instance, a “Beginner’s Guide to WordPress” might have sections on:
- What is WordPress?
- Why Use WordPress?
- What’s the Difference Between WordPress.com and WordPress.org?
… and so on.
Throughout your sections, make sure you’re explaining everything in clear, straightforward terms. If you need to use a technical term (like “web hosting”), explain it and/or link to a post that offers additional information.
Conclusion
At the end of your beginner’s guide, you’ll want to encourage readers to take action. That might mean taking the first step (in a “how-to” style guide) or simply encouraging them to try at least one new thing. You could also offer suggestions for going further, such as other posts on your blog to read, or even related products to try.
The conclusion of a beginner’s guide is also a great place to offer your services. Some readers may feel they don’t want to go through all the work of doing a task on their own, they’d rather pay you to do it for them.
Beginner’s Guide Blog Post Examples
How to Start a Blog in 2022: Easy and Free Beginner’s Tutorial (my tutorial): This beginner’s guide is structured primarily as a sequential how-to post, with a clear end goal in mind. As you read it, pay particular attention to the features I’ve included with beginners in mind, though.
For example, I’ve included FAQs the reader can expand if they need extra help on a particular step, like” “What if I can’t decide on a blog name (or topic) yet?)” or if they aren’t sure what a particular term means. (e.g. “What is web hosting?”).
Search Engine Optimization: The Beginner’s Guide to Understanding SEO (on Copyblogger): This beginner’s guide isn’t a how-to post, but instead seeks to introduce the reader to lots of different key concepts within SEO. It starts with basics like “What is SEO in marketing?” and also takes a reassuring approach with sections like “Is SEO easy to learn?” before going more in-depth into different aspects of SEO and practical tips.
3. List or “Listicle” Post Template

What is a List Post?
Sometimes called a “listicle,” a list post is one of the most common blog post formats. You can create a list post on almost any topic, but lists like “X Tips to…” or “X Ways to…” or “X Best…” are all particularly common online.
Key Benefits of the List Post Format
List posts are:
- Straightforward to plan, structure, and write. You can have a list post that’s just a list of points, or one that uses each point as a sub-header.
- Very popular with readers. Along with the “how-to” format (which is itself a type of list), list posts are one of the most popular types of posts.
- Easy to add to or extend. You can add more items to a list or go into more depth for each one without materially changing the post.
What to Include in Your List Post
A list post blog template includes:
- An introduction, plus potentially a “what” or “why” section that gives your list context.
- A list of numbered points. Normally, each point will be a subheading with a paragraph or more of text beneath. With a very long list (50+ items), you might simply present each item as one point in a numbered list.
- A conclusion – this is a great place to ask the reader to comment with their favorite point or even to extend your list by sharing their own tips or ideas.
Here’s how you could write and structure each of the sections in these kinds of blog post templates:
Introduction:
Begin by setting your list in context. You might want to ask a question, offer a key piece of advice or a statistic, or otherwise explain why this list is important or useful to the reader.
Numbered points:
With a list post, the first step of the content creation process is to come up with lots of different points you could make. Pick the strongest of these: don’t just list the first few ideas you come up with.
Think about how you order your points, too. With a long list post, you might split them into several different groups. You could also consider ordering them easiest to hardest, first to last, or alphabetically, depending on your list.
Normally, you’ll number the first point as 1—but if you’re creating a “top 10” list of books or other resources, you could vary this blog format by starting with 10 and working down to 1.
Conclusion:
Don’t simply end your list post with the final point: this can feel odd and abrupt for the reader. It also misses out on a great opportunity for a call to action. Instead, sum up the post – perhaps by suggesting the best idea or tip to try first. You could also invite readers to comment and let you know their favorite tip.
List Blog Post Examples
29 Best WordPress Themes for Bloggers (No Code Required) This Year: This roundup of WordPress themes is a long list, so I’ve included jump links near the start—which I tend to do for most of my list-based articles (even this one). That way, if readers are interested in a specific theme, they can easily go straight to that section. You’ll see I’ve structured each section of the list in the same way, with the title of the theme (linking to it), a screenshot, a description, and the price.
101 Best Side Business Ideas You Can Start While Working a Full-Time Job: With this list, I have a quick summary of each idea immediately after its sub-header. There’s also an image for each item, helping to break up the list since it’s such a long one. Although the post started as 101 ideas, I’ve since added extra ones, based on reader suggestions.
In the conclusion, I invite readers to share their ideas in the comments. I also have a short section to help readers get started by sharing tips on how to get funding.
If you’re still in doubt, remember that there’s a reason listicles consistently remain one of the most successful types of blog post templates out there today—most online readers want quick answers to their questions!
4. Expert Roundup Post Template

What is an Expert Roundup Post?
An expert roundup post brings together lots of experts in a particular field, asking them one question (sometimes two or three), and compiling their answers. The experts will most often be quoted by name, with a link to their website and/or social media accounts (in return for taking the time to answer your question).
Key Benefits of the Expert Roundup Post Format
Expert roundup posts are:
- Long, in-depth resources that require little writing (though sourcing and compiling the quotes will take quite a bit of time during the content creation process).
- Ideal for getting lots of social shares, as the people quoted within the post will usually share it.
- A great way to begin building relationships with influencers in your niche.
What to Include in Your Expert Roundup Post
An expert roundup blog post template includes:
- An introduction explaining why you created the post, and a preview of what they’ll learn.
- A number of quotes (usually at least 20) from different people in your niche. These could be split into sections.
- A conclusion, prompting the reader to take action and get started.
Here’s how you could write and structure each section within these kinds of blog post templates:
Introduction:
Start by explaining the topic or a question you asked, and why. You might want to name-drop at this point (e.g. “I asked top writers like X, Y, and Z…”) to give readers a teaser for what’s to come.
Quotes:
The main body of your expert roundup post could simply be a list of quotes. You should number each, name the person the quote is from, and link to them.
Many expert roundups go further with optional elements such as:
- A photo of each person being quoted.
- Extra formatting of the quote, like adding in subheadings if it’s long, or pulling out key points in bold text.
- Commentary on the quote that helps expand or make it more actionable for the reader.
It’s often helpful to group the quotes together into key sections. For instance, you might ask 20 people “What’s your top tip for writing faster?” Some of those quotes may relate to things you can do before writing and some might be focused on things you can do during a writing session. It would make sense to split your post into two parts accordingly.
Pro Tip: If you’re struggling to get quotes directly from big names in your field, you could instead choose a key quote from a blog post or book they’ve written. Just make sure you cite the source of the quote in your post.
Conclusion:
Your conclusion could sum up a key theme from the advice (e.g. “Just get started” or “Don’t be put off by early failures.”)
Because expert roundup posts get shared a lot on social media, they’ll often be read by people who aren’t familiar with your blog. This means your conclusion is a great place to point to another resource, such as a free download you offer to email newsletter subscribers.
Expert Roundup Blog Post Examples
60 Top Entrepreneurs Share Best Business Advice and Tips for Success: In this post, I bring together some of the key trends from the advice before giving the list of quotes. For the list itself, I use a consistent blog post format where I introduce each key business person before sharing their advice. The subheadings in the list are the individuals’ names.
To help make the post even more shareable, I have“click to tweet” quotes for all the people on the list, too—an important feature to encourage sharing whenever I lean on these types of blog post templates.
40 Top Bloggers Share Best Blogging Advice (to Grow Quickly) This Year: This expert roundup post is split into four key sections, corresponding to different stages in the growth of a blog, to make it easy for readers to find the advice most relevant to them. Each section begins with an introduction, then the quotes.
With this post, instead of using the person’s name as the subheading, I use a short quote from them. This is a great tactic if you want to highlight the advice itself. In this case, for instance, readers might be very new to blogging and not yet familiar with the names of top bloggers.
5. Glossary Post Template


What is a Glossary Post?
A glossary post gives a definition of a key concept, idea, or term and expands on it. It could also be called a “what is” post or an “expanded definition” post. This post may be published as a regular blog post, or it might instead be published as a page that doesn’t appear in the blog’s RSS feed.
Key Benefits of the Glossary Post Format
Glossary posts are:
- Great for search engine traffic. Beginners will often search for “what is…” when learning about a new topic.
- Useful posts to link together. Many large blogs create their own glossary of common terms (like my own Blogging Glossary of Terms).
- Helpful posts to refer back to from other resources. Like beginner’s guides, you can easily link to glossary posts from more advanced content, to explain concepts without needing to derail your post.
What to Include in Your Glossary Post
Glossary posts don’t always follow a single format. They tend to be fairly short (think 300 – 800 words), though they can be longer if that suits the topic and your style.
A glossary blog post outline template normally includes:
- A clear, straightforward definition of the term. This will normally be in the introduction to the post.
- Subsections that explore different aspects of the term, such as its history, or practical tips for the reader.
- A conclusion that sums up key points or links to further resources on that topic.
Here’s how you could write and structure sections within these types of blog post templates:
Definition:
At the beginning of your post (or at least within the first couple of paragraphs), you need to give a clear definition of the term. You might start your post with “X is …” or “X are …” then give a one-paragraph definition.
Subsections:
A very short glossary post may not need subsections, but it normally makes sense to include some. You could use common questions here – a great way to find these is to type “what is X” into Google, then look at the “People always ask” section.
Conclusion:
A great way to conclude a glossary post is with links to other posts. These could either be related terms – for instance, if someone’s interested in “What is WordPress?” they will likely also be interested in “What is a WordPress Theme?” Or, you could link to how-to guides or listicles that relate to the topic.
Glossary Blog Post Examples
What is WordPress? The Difference Between WordPress.org and WordPress.com: In this long-form glossary post, I have a clear definition of WordPress upfront. Because WordPress has been around for quite a while, I give a little bit of its history and explain how it’s used (and how widely it’s used) today.
The rest of the post digs into key topics about the difference between WordPress.com and WordPress.org, as this is an area that often confuses new readers. I also explain what themes and plugins are.
What is a Permalink? How to Make SEO-Friendly Permalinks and Edit Them: This glossary post on my blog explains clearly what a permalink is and how the default permalink structure is created in WordPress. It also explains why the permalink is important, talks about the difference between a slug and a permalink, as well as walking through my best practices for creating SEO-friendly permalinks that’ll help your content rank higher in search results—with plenty of links to additional content throughout.
6. Case Study Post Template


What is a Case Study Post?
A case study is a post that shares specific, real-life results. You could use a case study to highlight the success of one of your clients or customers, or you could have a case study that looks at how you achieved specific results.
Key Benefits of a Case Study Post
Case studies are:
- Impressive and persuasive marketing tools for attracting new clients. By showing the results that one client got, you demonstrate that you know what you’re talking about and know how to get results (making them one of the best blog post templates for conversion-oriented content goals).
- Useful posts for showing the practical application of the strategies and tactics that you teach through how-to posts, list posts, and so on.
- Popular with readers who want real-life figures and examples.
What to Include in Your Case Study Post
A case study blog post template includes:
- A short introduction that tells the reader about the individual or company in the case study. This is a good place to preview the results: you don’t want these to be a mystery, so don’t worry about spoilers!
- Several subsections that explain how the client got their results. Normally, these will follow a chronological pattern, explaining the process or steps the client went through.
- A conclusion with a strong call to action, such as inviting the reader to hire you to help them get similar results in their own business.
Here’s how you could write and structure each of those:
Introduction:
At the start of the post, give the headline figure or key result from the case study. For instance, “Donna, a busy mum of three, lost 50lbs in just one year. Here’s how she did it.”
You might also want to include a section after the introduction that gives the “before” picture of how the client was struggling to implement change before deciding to use your product or services.
Subsections:
There’s no one right way to structure your case study. If you frequently share case studies, though, you might want to come up with a consistent template you can use each time.
It’s helpful to give readers some background on the client, to share key milestones along the way (e.g. the first big spike in traffic that a client got after paying for your SEO services), and to include direct quotes from the client too.
Conclusion:
Because case studies highlight the real-life results of your expertise, they’re great posts for promoting your products or services. Make sure you close your post with a call to action, such as inviting people to hire you to get similar results for them (and linking to the page where they can find out more about your services).
Case Study Blog Post Examples
Content Marketing Consultant & Freelance for Hire: Ryan Robinson: This piece (that I wrote back when I was offering my content marketing services) prominently uses a case study that takes a detailed look at how I wrote a piece for a client that received more than 11,500 social media shares in under 2 months & skyrocketed to the top of organic search results.
As well as sharing that case study, I also include quotes from other happy clients. If you’re using a case study as one of your sales tools, you might want to think about including testimonials and incorporating that into your typical format for these types of blog post templates across your site.
How Ryan Robinson Increased Email Subscribers by 500% Using Exit-Intent Popups (by OptinMonster): This case study from OptinMonster begins by introducing a client of theirs (me!) and the problem I was having—wanting to grow my email marketing list quicker. It shares specific figures and points to a particular feature of OptinMonster (exit-intent popups) that made it work especially well for my site. The article ends with a short, powerful testimonial from me and a call to action to get started using OptinMonster.
7. A vs B Post Template

What is an A vs B Post?
An A vs B post compares two or more similar products or services the reader might be considering. For instance, you could have a post on “iOs vs Android” (be prepared for things to get very heated in the comments…)
You can also extend this blog post format into an A vs B vs C post, which we’ll explore an example of shortly.
Key Benefits of the A vs B Post
A vs B posts are:
- Likely to rank well in search engines. When someone is making a choice between two similar products or services, they will often search for “A vs B” on Google to find reviews that compare the two options.
- Great for bringing in affiliate income. If you’re an affiliate for both A and B, it doesn’t matter what choice the reader opts for: you get an affiliate commission! This means you can focus your post on helping readers decide what’s best for their needs.
- Good for positioning you as an expert in your niche. By writing about the pros and cons of two competing services or products, you demonstrate you’re on top of key tools within your niche—and that you’re committed to being fair.
What to Include in Your A vs B Post
An A vs B blog post template usually works like this:
- An introduction that explains what the two options are, briefly defining what they do or how they’re used.
- Sections that compare different key aspects of the two options, such as their features, price, and ease of use.
- A conclusion that gives a summary of your opinion on the two options, and makes a recommendation.
Here’s how to structure and write each of those sections:
Introduction:
Your introduction should explain what your post will be comparing, telling the readers a bit about the two options. Keep in mind that some readers may have heard of the two options without really knowing what they are.
You could also have an “Overview” or similar section straight after the introduction to give more details about each of the two options.
Comparative sections:
The sections of your A vs B post can compare the products side by side or they can tackle each product in turn.
For instance, you might have sections such as Overview, Price, Features, and Ease of Use. You might even want to give A and B a score (out of 5 or 10) or a grade (A, B, C, etc) for how well they do in each section.
You may also want to include specific data or statistics when comparing A and B. This helps make your post more objective. For instance, if A and B are hosting companies, you might compare their downtime or their customer service response time.
Conclusion:
You don’t have to suggest the reader should pick one product over the other in your conclusion—but you do need to make some kind of recommendation when you lean on this type of blog post template. That could mean telling readers something like “If you’re a beginner, I recommend A… but if you’ve been doing this for a while, I recommend B.”
A vs B Blog Post Examples
Blogger vs. WordPress: Which Should You Use? The introduction of this post explains the key difference between Blogger and WordPress, then gives jump links so the reader can look at how they match up in different areas. It compares the two options side by side, with a section on “Blogger Flexibility” then “WordPress Flexibility”, then “Blogger Plugins” and “WordPress Plugins” and so on.
ConvertKit vs AWeber vs MailChimp: The Best Email Marketing Tools for Bloggers: I tackle three different options in this post, making it trickier to compare them side by side. Instead, the post takes a quick look at the comparative pricing, then dives into a separate review of each. Note that each review has the same subsections: Who is X Best For, What Features Does X Have, What are the Drawbacks of X, and How Much Does X Cost.
8. Myth Buster Post Template

What is a Myth Buster Post?
The myth buster post is a great way to differentiate your content from other people’s (often repetitive) content. It lets you directly address misconceptions or poor advice in your niche. You can set out to bust a single myth, or take on a whole set of them—just prepare for your comments section to get active if you take a polarizing stance on a subject (which can be a very good thing).
Key Benefits of the Myth Buster Post
Myth Buster posts are:
- Powerful branding tools (when done well). Depending on the type of myth you choose to bust, you could be positioning yourself as honest, outspoken, and/or knowledgable.
- Good ways to highlight the importance of your products or services. If the myth is a common objection to buying that type of product or service, busting it can be a great way to nudge prospects closer to converting into customers.
- Useful posts for connecting with big names in your niche. If other people are speaking out against the myth, you can quote them and link to them in your post – this helps strengthen your argument and gets you noticed by A-listers.
What to Include in Your Myth Buster Post
Your typical myth buster blog post template usually includes:
- An explanation of the myth. This usually forms the introduction, or part of it. You might also explain, immediately after the introduction, how the myth came about.
- Clear reasons why the myth is wrong, perhaps giving evidence, examples, or several people’s opinions. Often, these will be split into subsections. If you’re writing about several myths, you’ll normally just have one subsection per myth.
- A conclusion that summarizes why the myth is incorrect.
Here’s how to structure and write each of those sections:
Explanation of the Myth:
Don’t assume readers have already heard the myth or that they understand it. Explain what the myth is. You could even quote people talking about it.
If you’re writing about a single myth, you might want to give more context by explaining how the myth came about. If you’re writing about several myths, you can briefly explain each one at the start of its subsection.
Reasons the Myth is Wrong
Some myths can be debunked quite quickly and simply–but in most cases, you’ll want to make several different points detailing reasons why the myth is wrong. It’s best to put each of these in its own subsection, making this blog post template more digestible to readers who will be scanning the page for answers.
While a myth buster post can simply share your opinion, it’s much more powerful if you can back your opinion up with facts and evidence. For instance, if the myth is “guest posting is dead” then you could share stats showing how you got a big boost in referral traffic and search engine rankings from your guest posting efforts.
Conclusion
The conclusion should summarize your stance on the myth. You might also want to encourage readers to speak out against the myth if they see it being repeated by other people.
Myth Buster Blog Post Examples
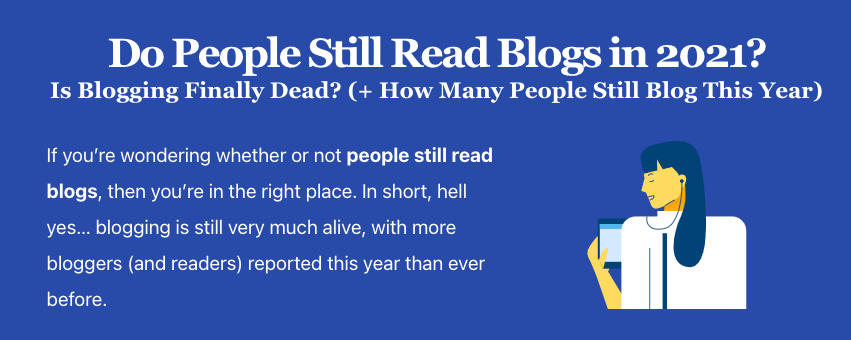
Do People Still Read Blogs? (Is Blogging Finally Dead This Year?): One persistent myth about blogging is that “blogging is dead.” I debunk that in this post, giving specific evidence (e.g. that 77% of Internet users report regularly reading blog posts) and giving a brief explanation of how blogging has grown and changed over the years. I also offer some tips on blog design, to help bloggers create a blog that people will want to read.
10 SEO Myths You Should Ignore (by Ahrefs): Like many myth-busting posts, this one takes aim at a number of common myths, debunking each of them and explaining why they’re at best misleading – and at worst likely to lead you to waste a lot of time and even money.
9. Product Review Post Template

What is a Product Review Post?
A product review post gives readers your thoughts on a specific product. Normally, you’ll give key information about the product (such as the price and main features) as well as your opinion on what you liked—and disliked—about it.
Key Benefits of the Product Review Post
Product review posts are:
- Great ways to bring in affiliate income. This is the main purpose of a product review post: you want readers to buy a product.
- Useful tools for showcasing your knowledge and expertise in your niche. By sharing your informed opinion on a product, you show readers you know what you’re talking about.
- A potential way to connect with product creators. Writing a glowing review of someone’s product is a great way to get on their radar. (Writing a highly critical review can certainly get you on their radar too, but is unlikely to be a good relationship-building tool!)
What to Include in Your Product Review Post
A product review blog post template includes:
- A clear description of what the product is. This will normally form the introduction to your review.
- Detailed discussion of what you liked (and didn’t like) about the product. Often, this will involve discussing key product features or highlights.
- A conclusion that summarizes what you think about the product and that makes a recommendation.
Here’s how to structure and write each of those sections:
Clear Description:
At the start of your product review, you should explain what exactly the product is. If there are several different versions, be clear about which one you’re reviewing. Make sure you include your affiliate link, too.
Detailed Discussion:
Most product reviews will be split into subsections. For instance, you might do an overview, key features, what you liked most, and what you didn’t like.
It’s important to be honest with readers on what you didn’t like about the product. You might not have much to say here – but including even some minor niggles helps make your review more balanced.
Tip: If you’re reviewing several products or services, your post will be formatted like a list post, with each product/service as an item on the list. You can have subsections for each product, like you would in an A vs B post.
Conclusion:
The reader wants your verdict on the product: should they buy it or not? You can use your conclusion to tell readers who the product would best suit or at what stage to buy it, but be sure to make that verdict easily discovered when using this blog post template. For instance, “If you’re a new blogger, this is an indispensable tool.” or “If you’re ready to upgrade to a premium theme, this is a great option.”
Product Review Blog Post Examples
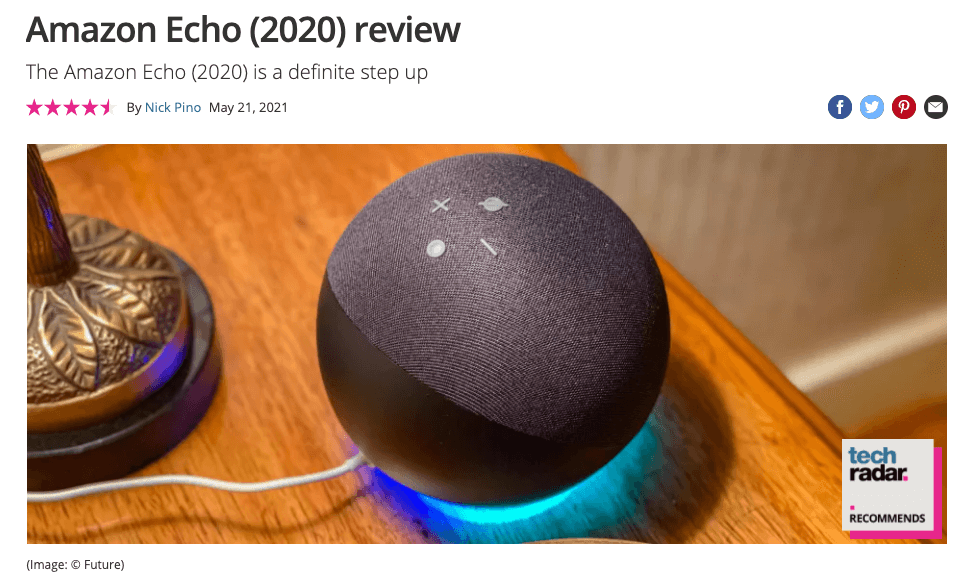
Amazon Echo (2020) Review (by TechRadar): This straightforward review from TechRadar starts with the verdict and quick pros and cons: this is a great strategy if you think your readers may simply want a quick summary. The review then goes into more detail and looks at specific sections like “Design” and “Performance”. In the conclusion to the post, there are “Buy it if…” and “Don’t buy it if…” sections to help guide the reader’s decision based on their circumstances and preferences.
9 Best Cheap Web Hosting Plans for Bloggers This Year (Cheapest Hosting Plans): This blog post lists and reviews nine different services (the most affordable web hosting plans), so I’ve structured it with a similar section for each hosting plan. For each plan, I share details of the price, uptime, support, and more, so that it’s easy for the reader to compare them. I end the post with a section recommending which of the 9 plans to go for.
10. Infographic Post Template

What is an Infographic Post?
An infographic post is one that’s built primarily around an infographic. With this blog post template, the infographic is the main feature of the article—but you’ll need to include some helpful text too.
Infographics aren’t quite as popular these days (as they were 5 to 10 years ago), but they’re still a great tool for sharing information in an engaging and visual way that can capture reader’s attention in unique ways compared to your average written article.
Key Benefits of the Infographic Post
Infographics are:
- Frequently shared on social media. A good infographic may also get reposted on other blogs (with a link back to your original post, of course).
- Popular with readers who want to take in information quickly. Infographics are perfect for displaying data and facts in a visual way.
- Helpful for introducing new readers to core topics on your blog.
What to Include in Your Infographic Post
An infographic post template includes:
- An introduction: This could be very short or quite long, depending upon your goals. It just needs to set the scene for your infographic, perhaps explaining what led you to create it, or what information the reader will get from it.
- The infographic itself. Obviously, you can’t have an infographic post without the actual infographic. In most cases, this will form the bulk of your post.
- A conclusion. Don’t simply end your post with the infographic: include extra links (to other infographics or related posts on your blog).
Here’s how to structure and write each of the sections in this blog post template:
Introduction:
Tell readers about the infographic. You don’t need to go into lots of detail, but you do need to give them some context. For instance, you might tell them (briefly) why you created the infographic.
Infographic:
You probably think about “designing” an infographic rather than “writing” it, but the words you choose for your infographic are still important. You won’t have space for much text, so think carefully about what to include.
Most infographics will use short sentences and bullet points rather than whole paragraphs of text. Keep the language you use simple and straightforward – and define key terms on the infographic itself, not just in the surrounding text.
You should also include links to sources of data used in your infographic. Most infographics have these as a list of URLs at the bottom of the infographic.
Conclusion:
Add a couple of sentences or paragraphs at the end of your post to round things off. You might encourage the reader to share the infographic, invite them to leave a comment, or link to other posts or infographics on your site.
Infographic Blog Post Examples
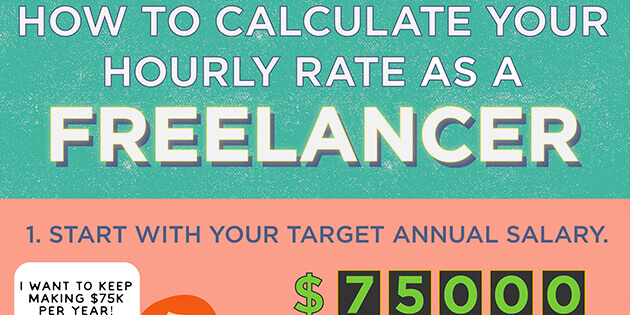
Infographic: Are You Charging the Right Hourly Rate as a Freelancer? In this post, I discuss some common questions and considerations about hourly rates in the introduction – as this is an area many new freelancers struggle with. After the infographic, I have a short conclusion that encourages readers to check out other resources.
The Crazy Way We Work [Infographic] (by Michael Hyatt): This post has a short introduction (one paragraph) that sets the scene for the infographic. At the end of the post, there’s a short conclusion encouraging the reader to share the graphic and to engage on social media. While this isn’t a lot of text, it’s plenty to help the infographic feel like an actual blog post rather than just an image with no context.
Need Catchy Blog Title Ideas?
Try my free AI-Powered Blog Title Generator Tool to get dozens of SEO-friendly headline ideas to make your blog posts stand out today.
Blog Post Templates Make Blogging So Much Easier (Final Words)
Using a blog post template makes it quick and easy to create great blog posts without all the guesswork and endless rewriting.


Templates won’t stifle your creativity.
Instead, they give you a framework for creating your very best content—content readers will want to come back to again and again (and share with all their friends).
Choose one of these templates to try today. Plan out the structure before you begin, including your subheadings—then all you need to do is fill in the blanks. And as a quick aside, if you’re in need of some help with your content planning efforts as a whole, grab my free blog planner bundle today.
You can also download my very own SEO-driven blog post template today. This template works with any of the templates above and helps you make sure that you’ve optimized your blog post for search engines by paying attention to keywords, links, competing articles, and much more. Be sure to try my free keyword research tool, too.
Free Download: My Time-Tested SEO-Driven Blog Post Template
Join 146,267+ bloggers in writing better content today. Enter your Name and Email below & I’ll send you instant access to the blog post template I’ve used (and perfected) to help generate more than 500,000+ monthly readers, 150,000+ email subscribers and over $50,000/mo in revenue from my blog.
You’ll Get:
- My customizable, copy & paste blog post template
- A done-for-you SEO checklist for optimizing your blog posts
- An already filled out blog post brief & outline to use as an example
“*” indicates required fields
Publisher: Source link

